Historical Safety Concerns

I am often asked if people in the medieval period knew that some of the pigments they were making were hazardous to their health. They were making and using pigments with mercury, arsenic, and lead. My answer is that of course they did. They may not have understood exactly how or why the pigment was hazardous, but they did know what happened to some people who worked with these pigments and knew to take as much precaution as possible.

Even during the Roman Empire people knew that some substances were hazardous and took precautions when working with them. In Pliny the Elder’s Natural History, Pliny describes the precautions workers took when polishing cinnabar. Face masks made of bladder-skin were used to prevent the workers from inhaling the mercury sulphide dust created from their work.

Vermillion paint

Cennini lists orpiment and realgar as toxic pigments. Orpiment is composed of 60 percent arsenic and realgar is 70 percent arsenic. Toxicity is all in exposure however, and Cennini says that orpiment is used to treat mites in hawks. While the chapter on realgar does not have any safety tips, the chapter on orpiment warns the reader not to allow orpiment to spatter into your mouth because of the toxicity. Lara Broecke theorizes that Cennini’s instructions to keep pigments under water are to keep fine toxic pigment particles from entering the artist’s lungs.

Multiple papers and websites tell of Leonardo da Vinci using a wet cloth face covering to protect his lungs from hazardous chemicals or dust, but I was unable to find a direct source.

We know so much more about the safety of historical pigments now. We have N95 masks and respirators, fume hoods, and gloves. We also have safe modern alternatives to poisonous pigment. If you choose to work with historical pigments, please use modern safety equipment and stay as safe as possible!

Use all available safety equipment!

Sources:

Broecke, Lara. Il Libro dell’ Arte. Archetype Publications, 2016. Pg. 94.

Pliny the Elder. Natural History: A Selection. Penguin Classics, 2004. Pg. 304.

The Seasonality of Pigments

Pigment making is something that can be done all year, but access to some of the materials for making pigments can be very seasonal.

Winter

Winter is a good time to make carbon black pigments. The cold temperatures make a fire in a fireplace or fire pit welcome. Many groceries stores carry nuts in the shell around Christmas time. If you wait until after Christmas, you can purchase almonds in the shell at a deep discount. The almond shells make a lovely blue-black when carbonized. To carbonize materials for pigment, put the material in a low oxygen container and put the container into the fire. This process works for almond shells, bone, ivory (mammoth ivory is legal), peach pits, grapevine, or hardwood.

Spring

Spring brings plant based pigments more into focus. This is the time to plant the dye plant seeds you purchased during the winter months. Most plants require that you wait until after the last frost so pay attention to the forecast and the planting expectations for your region. You may also be planting bulbs like saffron crocuses or perennial plants like columbine. Always be careful to avoid invasive plants for your region. These may include woad, weld, and buckthorn (shrub).

Later in the spring you can start to harvest flowers for green pigments. Blue iris petals and columbine petals make a lovely transparent green.

Summer

Summer adds more botanical pigment opportunities. Cornflowers and poppies will be ready for harvest and processing. Sometimes columbine will continue to flower during the summer. Blackberries can be used to create a reddish purple clothlet.

Late summer brings elderberries and buckthorn berries. Buckthorn berries will produce different colors at different times. When unripe, buckthorn berries will produce an orange tinted yellow. When harvested when fully ripe, buckthorn berries create a green pigment sometimes called sap green.

Feel free to experiment with various flowers. Although I have found no documentation for its use as a medieval pigment, I have used dandelion flowers to make a lake pigment. I have made purple pigment with red geranium flowers. Red roses produced a disappointing greenish brown.

You can also take advantage of the pleasant summer temperatures to work outside to do the things that I have learned not to do inside. At this point I am no longer allowed to do the following things inside according to my spouse due to noxious smells produced: make ink with vinegar and make garlic glair for gilding. Although we love the smell of garlic, when squeezing the juice from about 100 cloves of garlic, the vapors in the kitchen made our eyes water and became almost weapon grade. Same with simmering vinegar to make brazilwood or iron gall ink. Wine or beer used to make ink is tolerable inside, but vinegar should really be moved outside on a camp stove.

Messy processes like ink making or processing earth pigments can also be moved outside, but be careful of wind when processing earth pigments as the fine particles often make the most beautiful colors.

Fall

Fall brings botanical harvesting to a close and is the time to prepare for winter. Late summer or early fall are the time to divide irises and mulch perennials in preparation for winter.

Gladly Down the Rabbit Hole

I’ve been asked about my process of research. Overall, I begin by casting a large net and then following the best leads.

I usually begin with an internet search. Just a basic Google search for my topic of interest. Looking at what pops up helps me to refine my search with more specific keywords. For example, if you do a search for “illumination” you’ll get a lot of hits for electric lighting. I have much better luck with “illuminated manuscripts” as my search.

While Wikipedia should not be your stopping point, it can be a good place to find a general understanding of your topic and ideas for better search terms. Check out the resources cited for ideas on where to look next.

The best feeling is when you find that really good source. The source that directly addresses your question. The source that is well respected and cited by other articles. The source that has a nice long bibliography that gives you more resources to check out. Most exciting for me is to find a book that is a collection of multiple scientific or research papers that all center around the topic I’m studying. For my research in medieval trade in pigments, that book is Trade in Artists’ Materials: Markets and Commerce in Europe to 1700, edited by Jo Kirby, Susie Nash, and Joanna Cannon and published by Archetype Publishing. I found multiple papers from the book on academia.edu. Not only are the papers published in the book on track for my research, but I have followed many of the articles referenced to learn more. I found A Very Proper Treatise from different publications free online. I also learned about the Gnalic shipwreck which sank carrying pigments, some of which were pulled up from the bottom of the ocean and photographed.

The question that then follows is when do you stop your journey down the rabbit hole. That really depends on the purpose of your research. If you have a deadline, of course you have to stop before that deadline to write your paper, article, or book. If you are researching for your enjoyment, you can continue as long as you want. You may be limited by the resources available to you, the resources in a language you can understand, and the depth of research and resources in that area. You can request books from other libraries through library loan programs. If a paywall is requesting a large amount of money for an article, politely contact the author to inform them of your research and the paywall price. Often the author can send you a free or reduced price PDF of their article.

There are plenty of videos and articles out there on how to do research. Use those to find resources to check and develop your own process that works for you. Follow the leads and have fun. Cherish those wonderful sources that directly answer your questions but know that they are rare.

Turnsole

I was given turnsole seeds in 2019 and didn’t get a chance to plant them until this year. I was not sure that any would grow. I tried a few things before putting the seeds in the ground. One third of the seeds were soaked in water before planting, one third were soaked and the seed coats nicked, and the last third were left alone and planted without nicking or soaking. Half of each group was planted in a pot and the other half were planted in a flower bed in the same area. I watered the seeds after planting them and watered them each day for several weeks.

While the other seeds I planted around the same time sprouted (morning glory, zinnia, sunflower, cosmos), the turnsole did not, so I stopped watering them. That’s when I was greeted with a surprise. After several weeks of not watering the seeds, I found two sprouts! The plants kept growing and flower buds began to form. Soon little yellow flowers bloomed and the telltale tri-lobed seed pods began to form.

I am still waiting for the pods to ripen and collect both the seeds and the pods. The seeds I will plant in the spring, although I may leave a few in the pot to see how they do with some cold during the winter. The seedpods I will soak to extract the red color. Hopefully I will have more plants next summer and will be able to pick some pods before they fully ripen to extract a blue or purple color.

Recipe from De Arte Illuminandi (Pages 5-6) to make clothlets with turnsole:

It is made also in another way from the plant called turnsole, and it stays blue in color for a year; afterwards it turns into a violet color.  Now this is the way to make the color from this plant.  Take the seeds of this plant, which are gathered from the middle of July up to the middle of September.  And it has yellow <…> and its fruits, that is, those seeds, are triangular.  That is because there are three seeds joined in one.  And they should be gathered when the weather is fair.  And the seeds are to be freed from the stems from which they hang, and put into an old, clean, linen or hempen cloth.  And fold up the cloth, and draw it through your hands, until the cloth is saturated with the juice; and the kernels of the seeds do not get broken.  And have a glazed porringer and squeeze the juice out of this cloth into this porringer; and again take some more fresh seeds of the plant and extract the juice in the same way, until you have enough of it.  Then take some other good clean linen cloths which have been wet down first once or twice in a lye made with water and quicklime; and then wash them very thoroughly with clear water and dry them.  (They can even be prepared plain, without <using> the lime.) And when they are dry, put them into this porringer where the juice of the aforesaid plant is; and let the cloths soak up enough of this juice to saturate them thoroughly.  And let them stand in this porringer for one day or a night. Then have a dark, moist place, where you may put some garden loam in a winecup or other suitable dish, or upon screens, where neither wind, sun, rain nor water may get at it; and let there be voided upon this loam a quantity of the urine of a healthy man who has been drinking wine.  And over it, furthermore, you upt up a structure of light reeds or other little wooden rods, so that the cloths soaked in this liquid may be spread out above the vapor of the urine, <but> in such a way as not to touch the wine-soaked earth described above, because they would be spoiled.  And then let them stay this way for three or four days, or until they dry there.  Then put these cloths under books and keep them in a box; or put them into a glass jar, close it up, put it in quicklime, not slaked, in a quiet, dry spot, and keep it.

Iris Green Clothlet: Unexpected Color

Yesterday I taught a class in making iris green pigments. As a part of the class I demonstrated how to use a clothlet. You cut a small square off of the clothlet and place it into a seashell. You then add a little water to help the color come out of the clothlet so that you can paint with the pigment. Often you add a binder like glair or gum arabic. I added a little water and let the clothlet sit in the seashell for several hours. When I came back to the seashell, the color had come out of the clothlet and the color was not what I expected. Normally I see a forest green. This pigment had turned almost a malachite color! I’m not exactly sure why it became so pale, but it’s a lovely color. I could have more than usual alum in the clothlet, or perhaps the calcium in that particular shell turned the color pale. You can’t always predict what you will get with natural materials.

Lake Pigments

It’s about time for me to make a few more lake pigments to bulk up my stash. I chose some of the ones I haven’t made in a while: buckthorn, weld, and lac. All are medieval illumination pigments. Buckthorn is a berry and makes an orangish yellow color. Weld’s yellow leans toward the green hues and is from the dried stem of the plant. Lac is a lovely purplish red and is an insect resin.

Each dyestuff was put into a jar with 1 teaspoon of potash and 1 cup of water. I used 1/4 cup of dye stuff for the buckthorn and weld and since the lac is ground really fine and I didn’t have a lot of it, I used 1/8 cup of dyestuff. Tomorrow I will strain the plant bits/insect resin bits out of the dyed water, combine it with a calcium carbonate (chalk) and alum, and let it dry out.

Basic recipe for lake pigment:

  • 1 tsp potash
  • 1 cup water
  • 1/4 cup dyestuff
  • 1 tsp calcium carbonate
  • 1 tsp alum

Combine potash, water, and dyestuff in a jar, shaking once in a while to mix. Allow to sit overnight. Strain out dyestuff using a cloth (linen or flour sack towel). Put dyed liquid in a non-reactive pot. Heat to not quite boiling. Add alum and calcium carbonate, stirring briskly. Pour into an unglazed clay pot saucer. Allow to dry. Scrape out of the saucer and grind on a glass slab with a muller and a little water. Allow to dry in little cakes or dry and put powder into a small jar.

Leonardo da Vinci’s Drawings: Cennini’s drawing techniques in practice

The Royal Collection Trust has an extensive collection of photos of drawings by Leonardo da Vinci. After doing quite a bit of experimentation and study on Cennini’s Il Libro dell’Arte, it was really cool to see these drawings and pick out the different methods used with an eye toward the process and materials used. While not contemporaries, I’ve picked out some of these drawings to discuss how they relate to Il Libro dell’Arte. I highly suggest browsing the website and looking at the wide variety of drawings in various states of completion, various techniques, and various subjects. For each of these I have included a hyperlink to the drawing on the Royal Collection Trust’s website in the heading and an explanation underneath.

*Note!* Because of the death of the Duke of Edinburgh, the links do not seem to be working correctly. If you have a problem getting to the drawing, copy the name of the drawing, copy into the search bar on the website, and add da vinci to find the drawing I’m referencing.

Head of Leda

17.7 cm (7.0 in) x 14.7 cm (5.8 in)

This drawing is worked in black chalk with pen and ink. Da Vinci made several drawings of this title, all that I found were of pen and ink and many had chalk for shading.

Design for an equestrian monument

14.8 cm (5.8 in) x 18.5 cm (7.3 in)

This is a rather preliminary sketch on blue prepared paper with a metalpoint. The collection of da Vinci drawings contain quite a few on colored prepared paper. The two most common colors seem to be blue and an orange.

Diagrams of a machine and tools for mixing mortar

22.4 cm (8.8 in) x 16.8 cm (6.6 in)

This is another sketch on blue prepared paper, but the blue is much more pale. The topic of the drawing is interesting because it is not an artistic stetch, but more of a practical drawing. Since this is a drawing meant to outline a process as opposed to an draft of an artistic drawing, the drawing is much rougher with less detail. For this drawing, da Vinci started with metalpoint and then inked in the design.

Head and shoulders of a woman

16.5 cm (6.5 in) x 12.4 cm (4.9 in)

This is another metalpoint drawing on light blue prepared paper. The face has nice definition and shading, while the rest of the drawing is very rough. The museum believes that the rough sketch was made by da Vinci and the shading was done by a student to practice.

The hindquarters of a horse

19.5 cm (7.7) x 12.7 (5)

I thought this drawing was interesting because it is part of an animal with great muscle detail. The color for the prepared paper is different in this drawing: a light pink. I got a very similar color with a little vermillion in the bone ash and white pigment.

A Map of Imola

44 cm (17.3 in) x 60.2 cm (23.7)

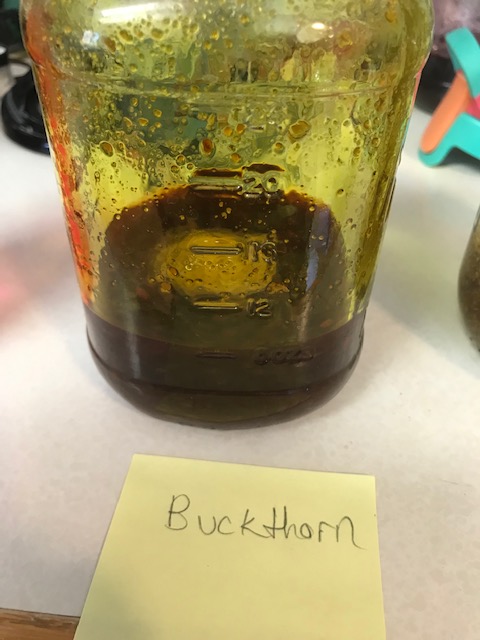
This drawing has some fun additions from just black chalk lines. The map has multiple colored washes to denote water and land features. The blue looks to be indigo. The yellow could be buckthorn due to the orange tint. Cennini said that drawings could be colored with washes of ink, pigment, or clothlets.

The head of the Madonna

24.4 cm (9.6 in) x 18.7 cm (7.4 in)

This is a drawing of the Madonna worked with red and black chalks on prepared paper. The interesting parts of this drawing when studying the drawing techniques listed by Cennini is the brush and ink shading and the white highlights. In chapter 10, Cennini talks about shading with ink diluted in water. He advocated starting with a few drops of ink in a walnutshell of water and then adding more ink to make darker shadow. You can see the ink shadow in the Madonna’s veil. Highlights were made with a little lead white in the Madonna’s veil.

The drapery of the Madonna’s arm

8.6 cm (3.4 in) x 17.0 cm (6.7 in)

There is a whole lot going on in this drawing. The drawing was made with pen and ink, perhaps over a silverpoint sketch since the paper is prepared with an orange tint. Red and black chalks add layers and depth while white lead wash adds highlights. This drawing was apparently used as a teaching tool since the hand seems to be done by a student.

Sprigs of oak and dyer’s greenweed

18.8 cm (7.4 in) x 15.4 cm (6.1 in)

I adore da Vinci’s botanical drawings. Many of his botanical drawings are done in red and white chalk on red prepared paper. This drawing has some holes along one margin which may indicate that it was bound into a notebook at one time.

Sketches of two standing figures and one kneeling figure

2.3 cm (.9 in) x 3 cm (1.2 in)

This is just a rough sketch in pen and ink on a scrap of paper, but I love that it isn’t beautiful. It isn’t perfect. It’s rough and makes me think of da Vinci’s process and how ideas and art evolve.

Class Handout: Teaching a Class in the SCA

Here’s a link to my outline for the class Handout

Virtual or Face-to-Face: How to teach a class in the SCA

Everyone has something they can share. You don’t have to be the world’s expert on a subject! Sometimes it just takes a little preparation and inspiration to teach a class. I’ll discuss how to teach a class from picking a topic, to planning, to just before the class, during the class, and after the class. Lecture class with participation and questions welcome. We can always use more teachers in the SCA. Come get tips and hints on teaching!

Book Pages

I was honored to be asked to do some book pages for a dear lady who needed a lift while going through some really rough times. Several other artists contributed to the project and the diversity of art was really neat to see. I often find it hard to find the motivation to make art during this pandemic, but I was able to find the inspiration for this project. This was a really fun project. Here are my pages.